

System Configuration :
Model NAME - MSI gf63
Operating System - Windows 10 home
RAM - 8GB
Storage - 512GB SDD
INSTALLATION :
Download CentOS - centOS
click on CentOS Linux DVD ISO, then choose a mirror link geographically closer to you and start the download.
Installing Oracle VirtualBox - oracle VM
Double click on the installer to launch the setup Wizard. Click on Next to continue and install the virtual box.
Enabling HYPER-V virtualization :
- Open up
Task Manager->Performance Tab.You should see Virtualization as shown in the below screenshot. If it is enabled, it means that your CPU supports Virtualization and is currently enabled in BIOS. If it shows disabled, you need to enable it in BIOS. If you don’t see virtualization, it means that your CPU does not support virtualization.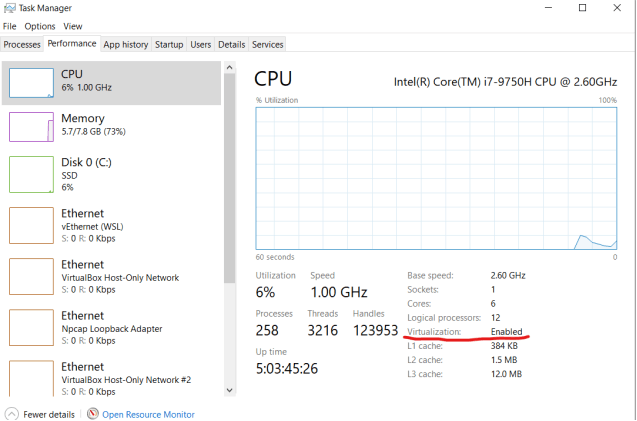
- To enter the BIOS of your system (MSI in my case), restart your system and then press the
Deletekey after the computer powers on but before it begins to boot. Now you have enteredBIOS setup Utility, enable the virtualization technology using up or down arrow keys in the System Configuration Tab. After that save and exit.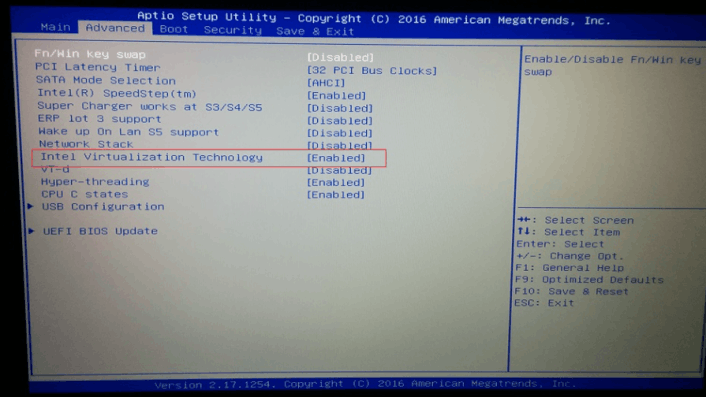
Setting up Hyper-V:-
Go to Start menu->Settings->Apps->Apps and features.
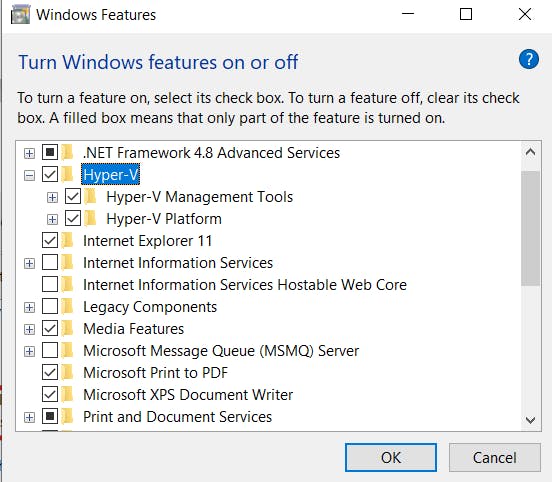
At the bottom, you will see the program and Features. Click on it. In the Program and Feature windows, you will see Turn Windows Feature On or off. Click on it.
Check Hyper-V, Virtual machine platform, Windows Hypervisor Platform and then click OK.
However, if you are using Windows 10 Home Edition, then you will not have the Hyper-V option in the Turns Windows feature on or off.
So to Activate Hyper-v Feature on Windows 10 Home… Create a new file name Hyper-V Enabler.bat and paste the below code in that.
pushd "%~dp0" dir /b %SystemRoot%\servicing\Packages\*Hyper-V*.mum >hyper-v.txt for /f %%i in ('findstr /i . hyper-v.txt 2^>nul') do dism /online /norestart /add-package:"%SystemRoot%\servicing\Packages\%%i" del hyper-v.txt Dism /online /enable-feature /featurename:Microsoft-Hyper-V -All /LimitAccess /ALL pause
Now Right-click on that and select Run as Administrator. It will open a Command prompt to run the code saved in it.
Wait for the process to complete. In the end, you will be asked to restart your computer. Please go ahead and restart your computer for the rest of the process to complete.
Creating a VirtualBox Virtual Machine for CentOS
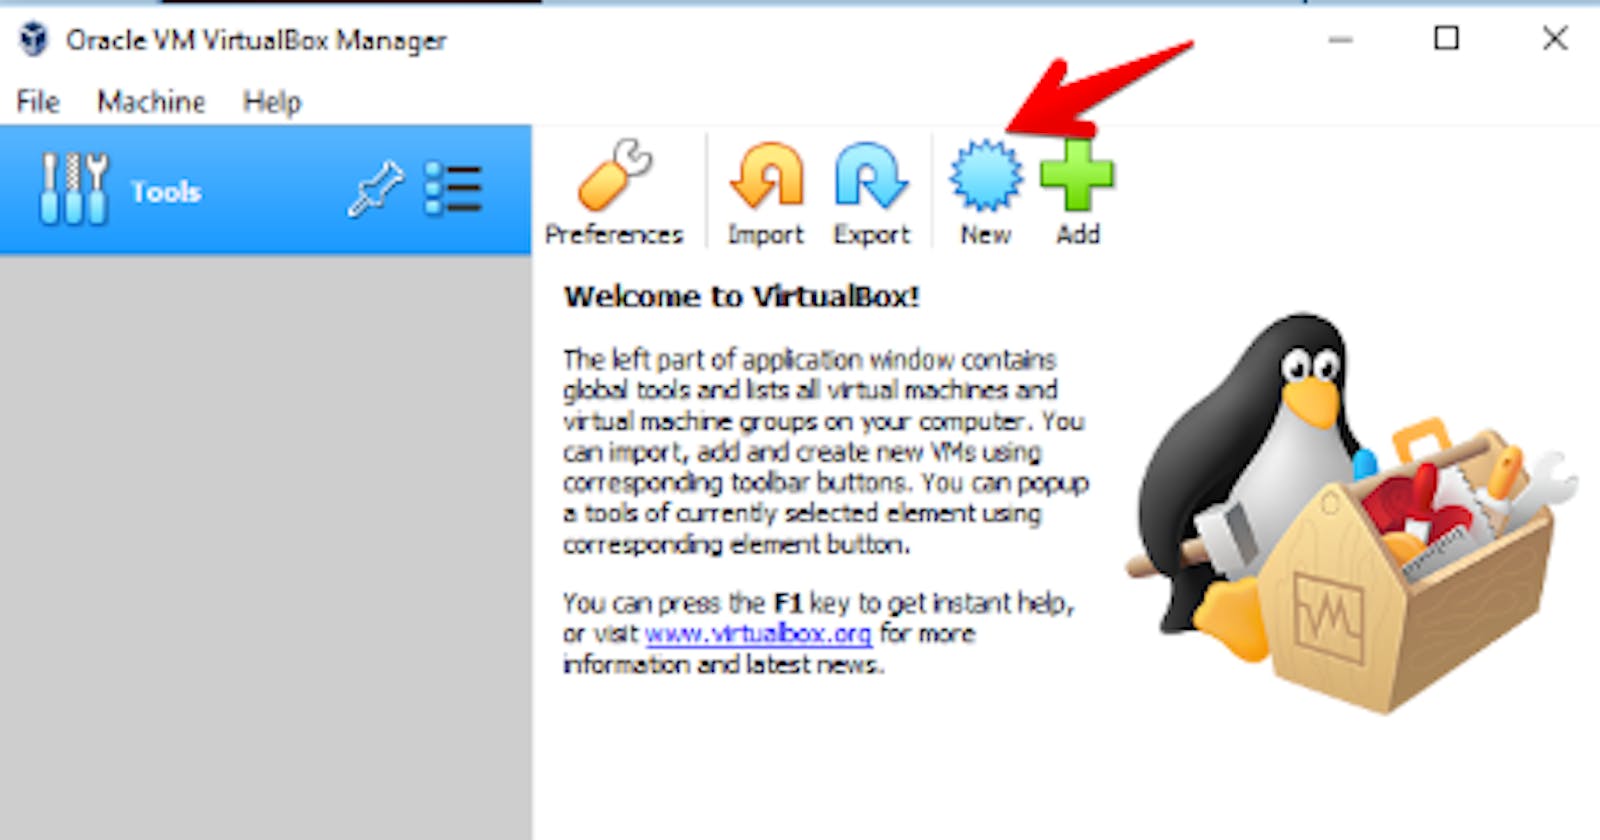
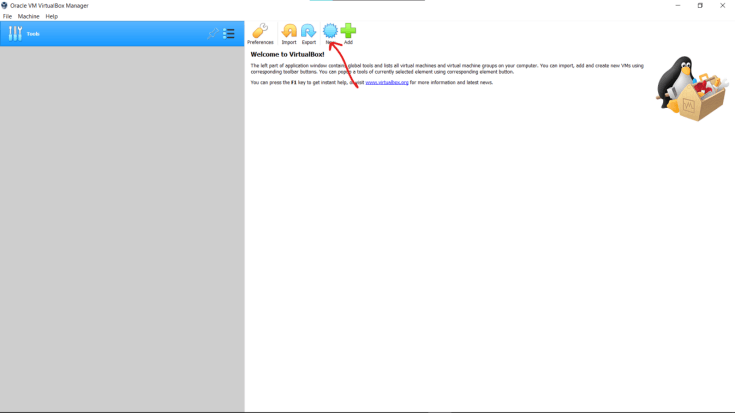
- Open the oracle virtual box application and then click on New
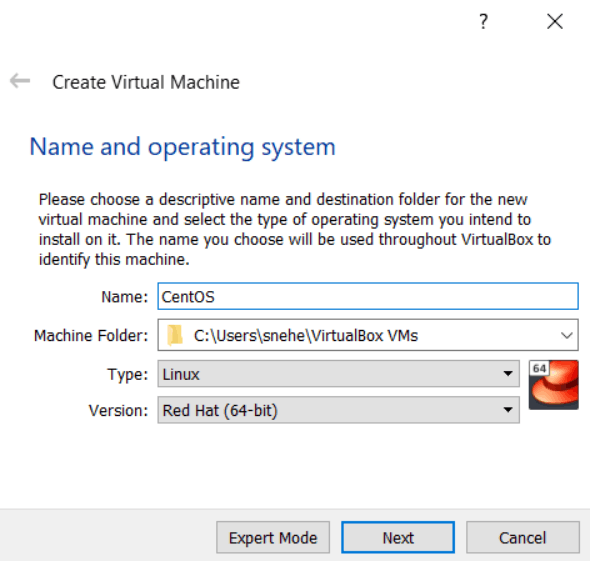
- Now, type in a name for the Virtual Machine (VM), select the Type to Linux and Version to Red Hat (64-bit). Then, click on Next >.
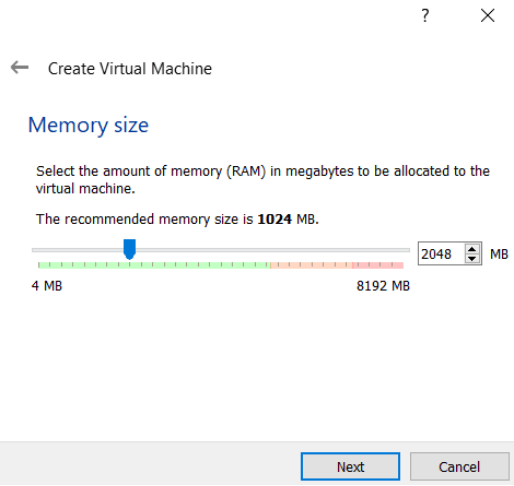
- Now, you have to set how much Memory (RAM) you want to allocate to the VM.
- Now click on create virtual disk now radio button from the window and click on create. Now select the
hard disk file type VDIfrom the window. Select dynamically storage from the radio button. And click on next. Select the size of the virtual hard disk from the scroll. And click on create.

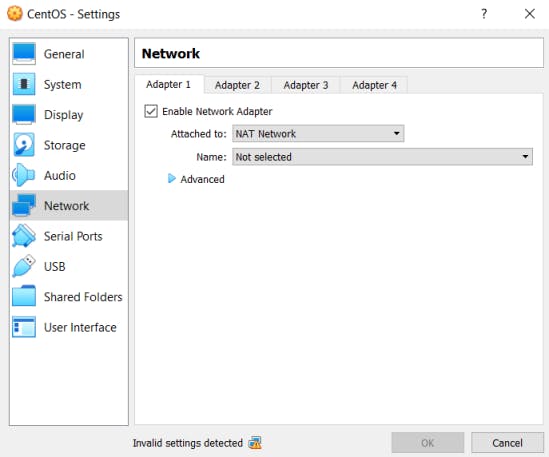
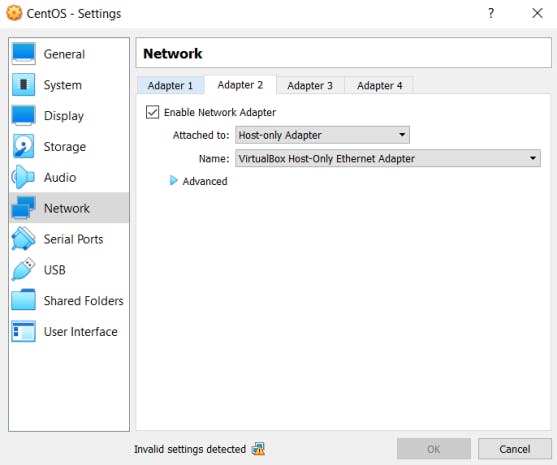
- Now we have to set the network server of the newly created virtual machine by clicking on the settings
option. Click on the network option from the settings. Change the adapter 1 settings from NAT to nat network. From adapter 2 check the uncheck box and click on the host-only adapter and click on OK.
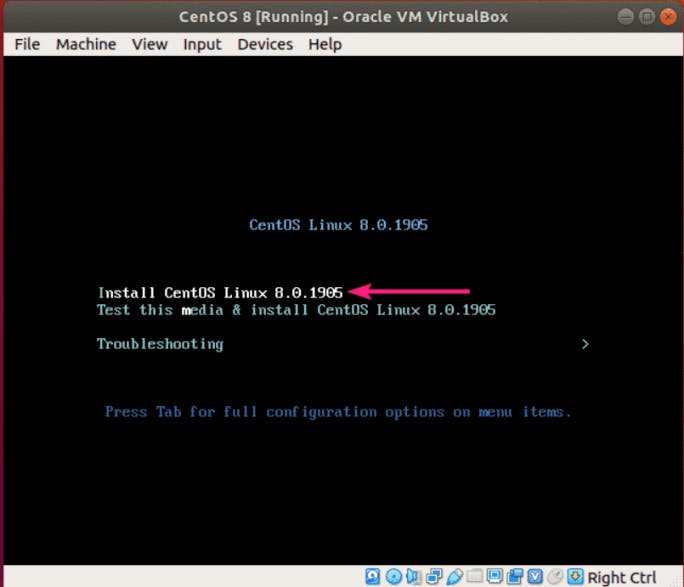
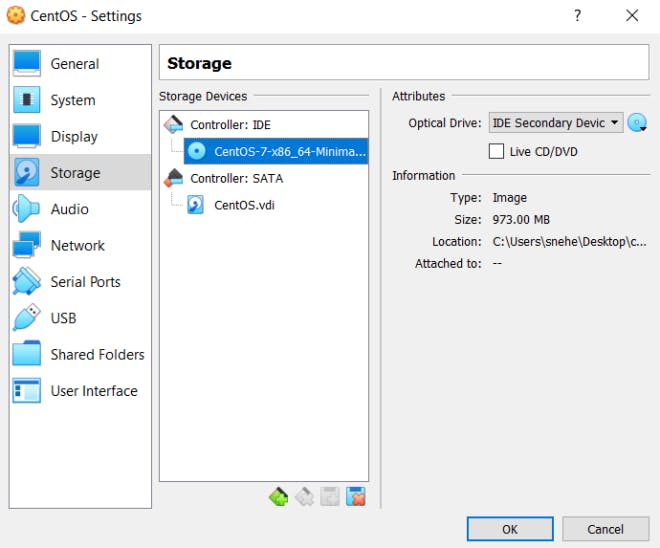
- Now, go to the Storage section. Then, click on Empty in Controller: IDE, then click on the CD icon and click on Choose Virtual Optical Disk File. Select the CentOS 8 ISO installation image and click on Open, Then click OK.
- Now start the virtual machine by clicking on the start arrow. Now, click on Installation Destination. Then select the virtual hard drive, select Automatic from Storage Configuration section, click Done and then Click Begin Installation. In between the Installation of the machine select the
root useranduser password. Then reboot your system. Your New Virtual Machine is now successfully created.