


Table of contents

No headings in the article.
Imagine that you have a project or an application running and you wanted to add some more features to your app but then your application breaks due to some errors. Wouldn't it be nice to have the power to go back to your application's codebase during the time when it was running just fine? That's where Git and GitHub come into the picture and help you with that sort of thing.
Let's first take a look at some of the basic terms that you might need to know before you learn how Git and Github works...
Git - A software that helps us keep track of what changes are being made into a repository(project's codebase) that is being shared by multiple people. Also with Git, you can revert to various states of your repository. Download Git from here.
Github - An online platform(just like social media) that allows us to host our git repositories. You first need to make a Github account before you begin with this tutorial.
Repository - It is basically just a folder where you keep all the files of your application's codebase and then publish it to GitHub using the help of Git.
This is the first part of my tutorial where I will be guiding you on how you can use various git commands to push your project's codebase to Github. In the second part, I will be helping you with various features that are available in Github and some extra git commands that are must to know.
Now before we begin, I assume that you are well aware of what a terminal(Powershell in windows and terminal in Mac and Linux) is and you have also successfully downloaded git and have also made your Github account.
STEP 1 - Open your terminal, cd into your project's folder which you want to publish over Github. Run
git init. This will turn your folder into an empty git repository.
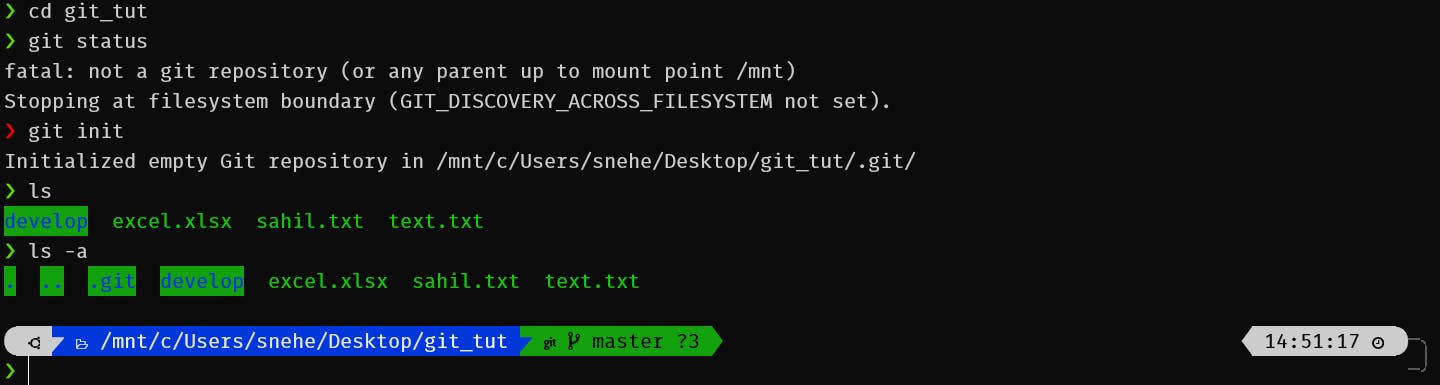
This command has also initialized a hidden .git folder into your repo which is required by the software. You don't need to worry much about that for now.
STEP 2 - Now the repo which you've just created is empty and whatever changes you've made into that is unknown to others with whom the repo is to be shared. GIt maintains a complete history of changes being made into a repo again and again. Now run git status. This shows the current status of your repo.
 This shows that changes have been made to the repo as some files were added which are yet untracked by git.
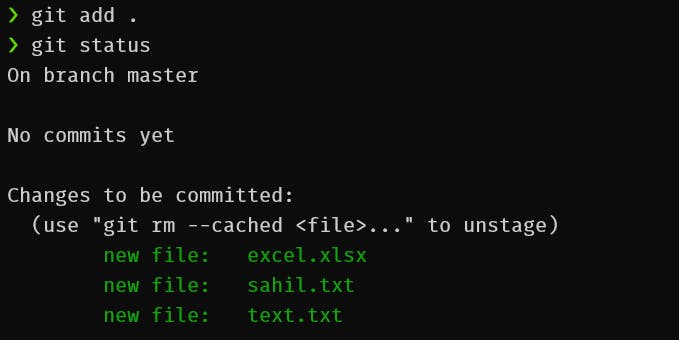
Now we want to add these changes to the repo and for that, we run
This shows that changes have been made to the repo as some files were added which are yet untracked by git.
Now we want to add these changes to the repo and for that, we run git add <filename> or git add ., . means everything in the current directory or folder that is yet untracked. So now git can track these files too.
STEP 3 - Now the changes that we have recently added to our repo is still not permanent. There might be cases where we would like to undo our added files if we do not wish to keep them in our repo.
So to undo your changes run git restore --staged <filename>.
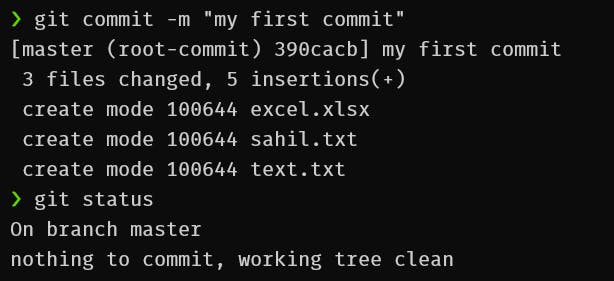
But if we are fully confident about those changes and are ready to go with them then we have to commit those changes with the command git commit -m "your commit message".
-m means providing a commit message, this is necessary especially when you work on open source projects, so that other contributors can get a description of what changes you have made to the repo.
 Now you can also view the entire history of the repo(what, when and by whom changes were being made to the repo) using the command
 git log.
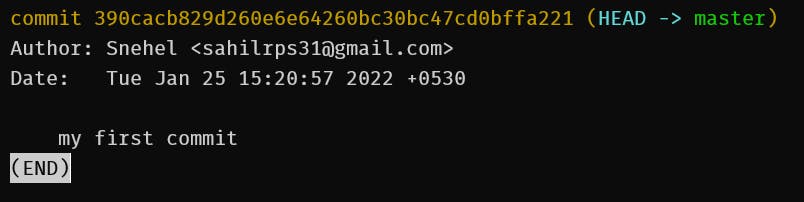 Enter q to exit.
STEP 4 - Now our repo is ready to be pushed to Github. First login to your Github account, click on + and then click 'New repository'. Name your repository, make it public or private that's your choice. We will learn about README or .gitignore files later, so don't worry about them for now.
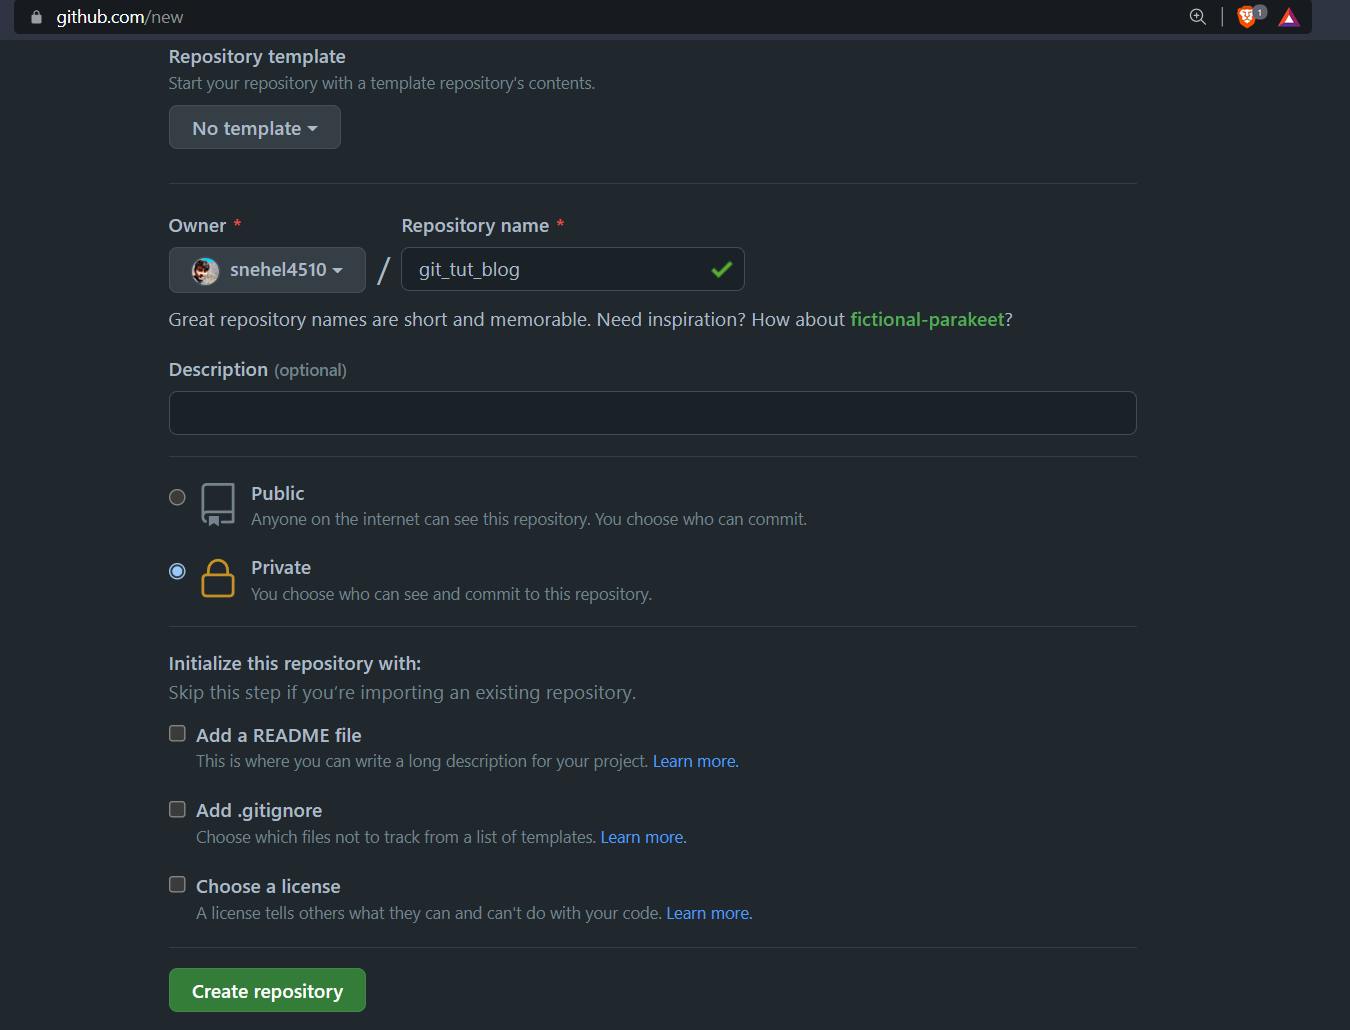 Click on Create repository
STEP 5 - Now you've got the URL of your GitHub repo and you want that to be attached with your local git repo present on your system. The command for that is git remote add origin <URL>.
Here remote means your local git repo is remotely separate from your URL(Github repo) and you want both to be added. Origin is the name you've given to your Github repo URL. It can be anything, but by convention, it is named Origin among developers.
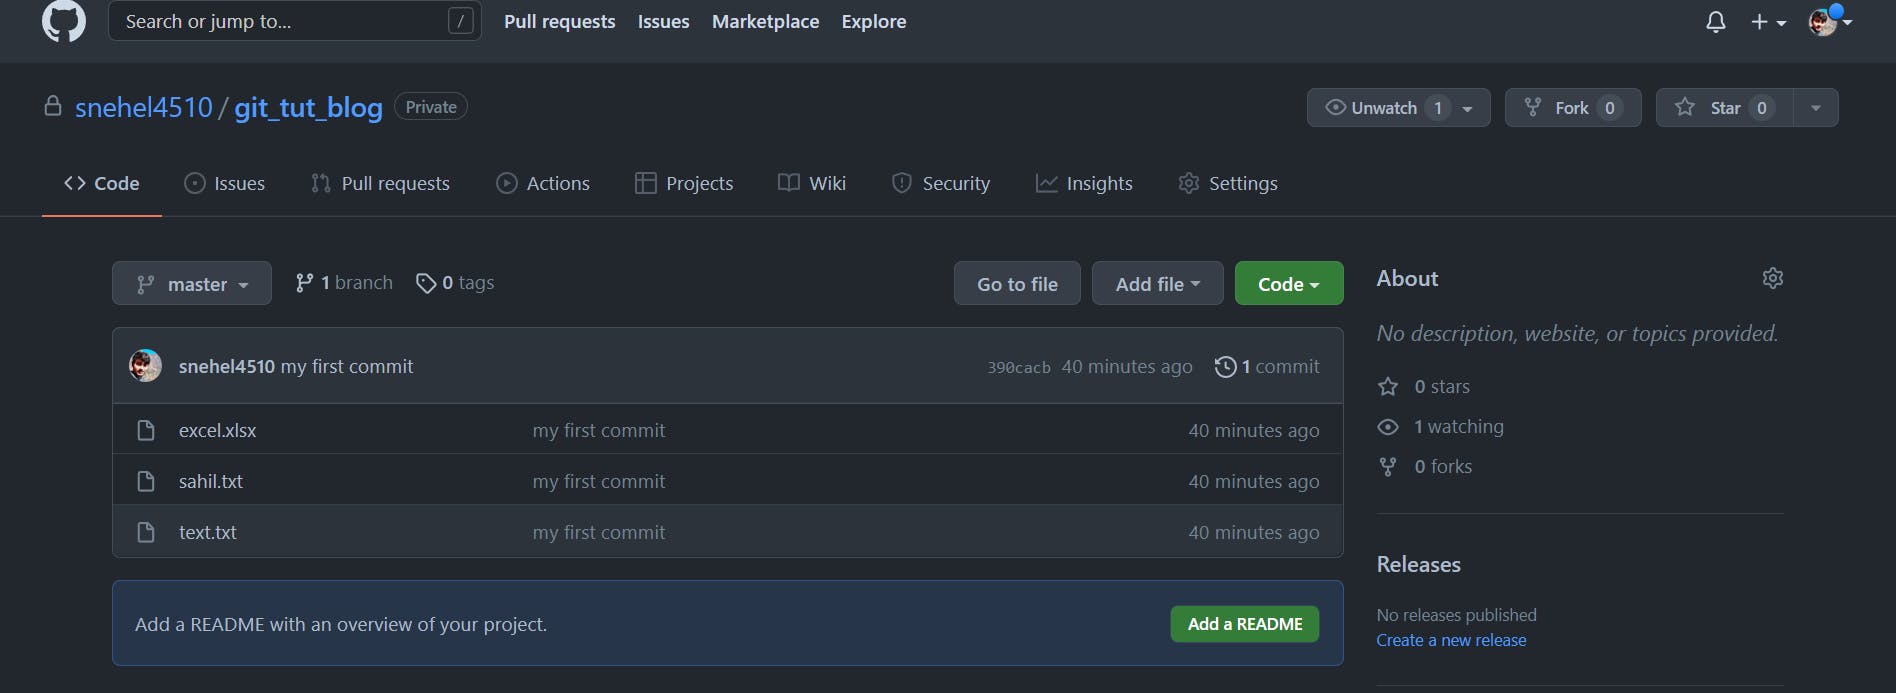
STEP 6 - Now since both your repos are attached together, it's time to push the codebase present on your local git repo into your Github repo, and the command for that is git push origin master.
 Here origin is the name of your repo URL and master is the branch on which you were working. We will look more into git branches in the second part of the tutorial.
Now take a look at your Github repo and you will notice that all your project's codebase is actually now available there.
So now with these 6 easy steps, you have learnt how to create Github repositories, how to work with git commands and how to push your local project's codebase into GitHub. In the 2nd part of this tutorial, we will dig into some more features of Github like forking a repo and contributing to open source projects, branching in git, managing merge conflicts and some extra git commands like reset, rebase, stash, .gitignore, etc that will help us reach previous stages of our repo.